
 Bookmark
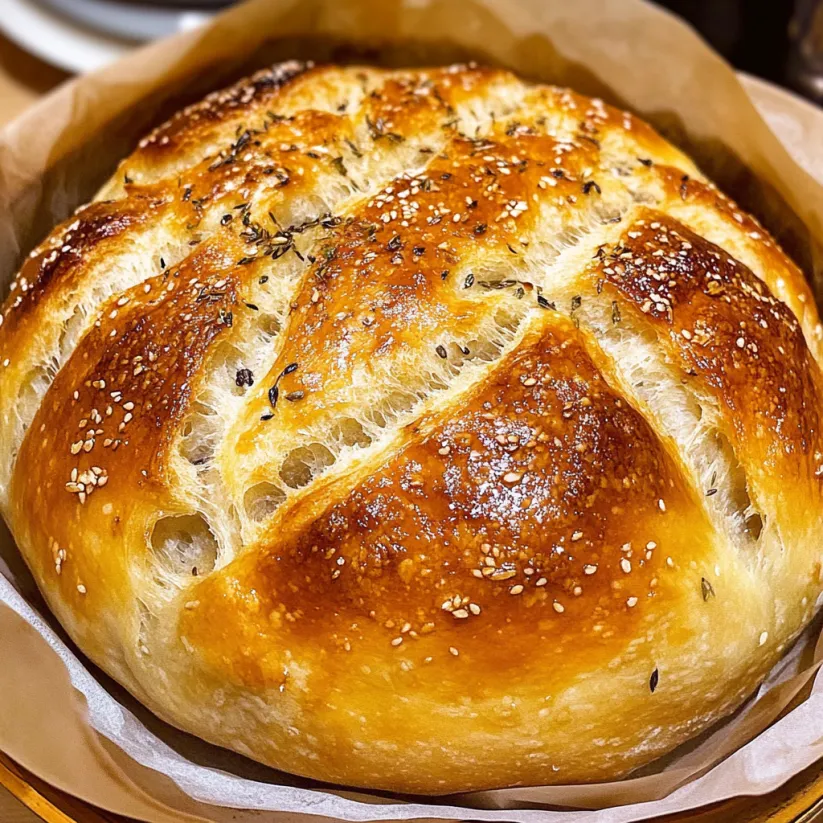
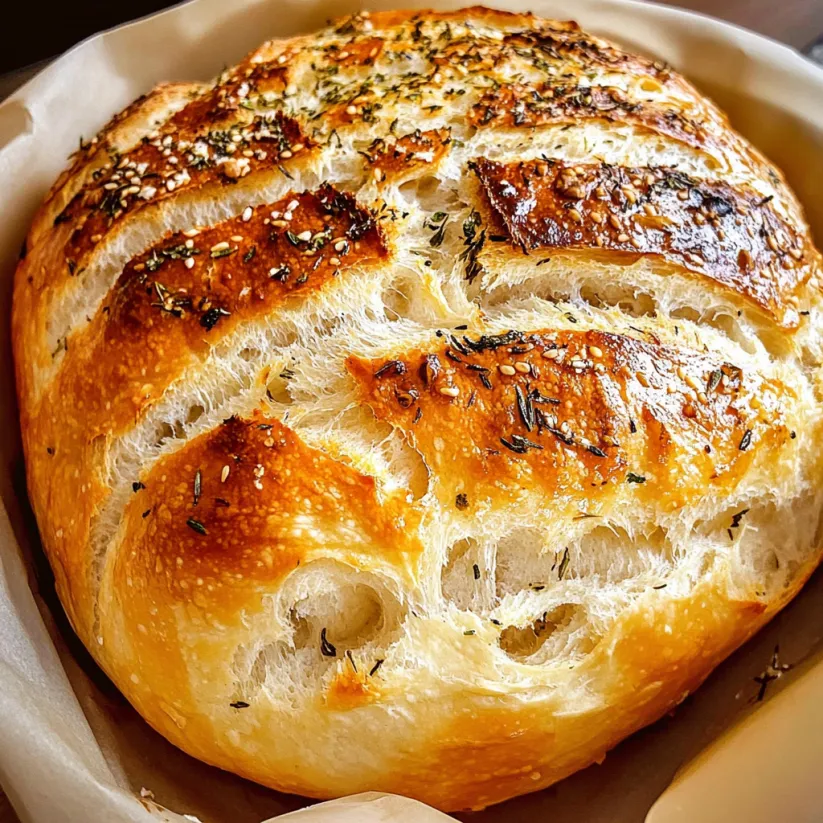
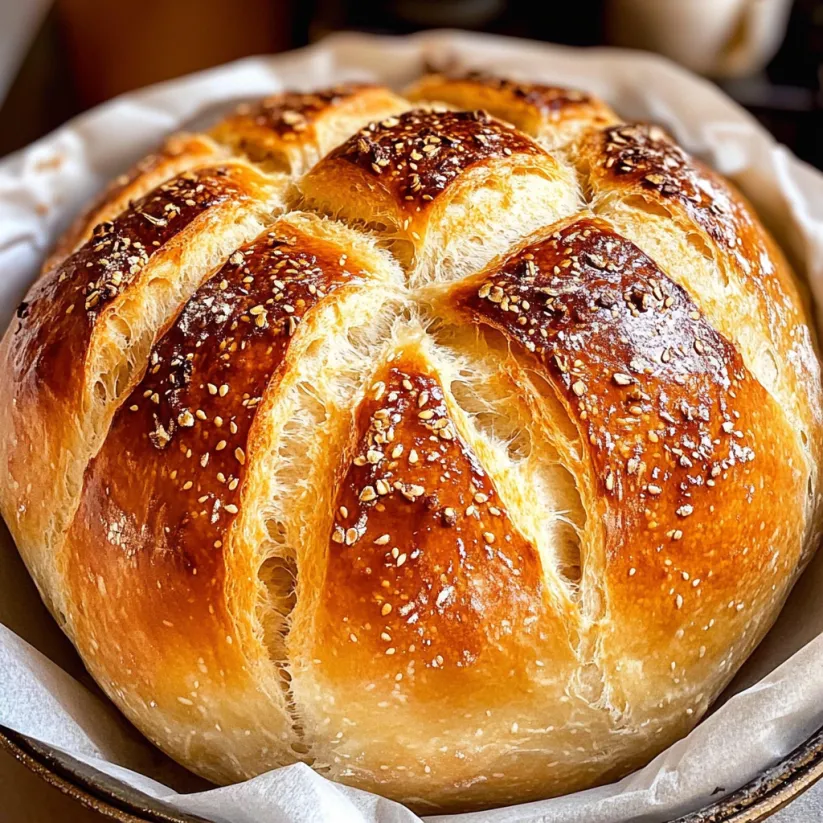
Nothing beats the feeling of pulling a fresh loaf of rustic no knead bread from the oven with golden crust crackling as it cools on your counter. This recipe is truly hassle free and delivers bakery style bread with minimal effort all you need is four humble ingredients and a little patience.
I first made this on a cold weekend afternoon trying to impress my family and that first loaf disappeared faster than anything I have ever baked. Now everyone asks for it for holidays and Sunday dinner alike.
Ingredients
- All purpose flour: gives a perfect balance of chew and softness try to use unbleached for best flavor
- Salt: brings out natural wheat flavor use fine sea salt for optimal dissolving
- Active dry yeast: lets the loaf rise tall and airy check freshness by smelling for a faint bready aroma
- Water: activates yeast and brings it all together filtered warm water between 110F to 115F will help get the perfect start
- Tip If your flour is fresh and stored airtight you will get the best loaf with the sweetest aroma
Step by Step Instructions
- Form the Dough:
- In a large bowl combine flour salt and yeast. Pour water in and mix thoroughly until a sticky shaggy mass forms. There is no need to proof the yeast. Stir from edge to center scraping sides so everything is well hydrated
- Allow it to Rise:
- Cover the bowl tightly with plastic wrap and leave it on the counter or in an unheated oven for twelve to twenty four hours. The dough should double and be bubbly on top as slow fermentation builds flavor
- Preheat Oven and Pot:
- Set your oven to four hundred fifty degrees Fahrenheit. Place your Dutch oven inside while it heats so it gets blazing hot which gives that signature crispy crust. Handle with care using mitts once ready
- Shape the Dough:
- Flour your hands generously and dust the dough surface so it is easier to handle. Gently lift the dough from the bowl shaping into a rough ball. Sprinkle some flour or line the Dutch oven with parchment for worry free release. Drop dough right in. Cover with lid
- Bake the Bread:
- Bake with lid on for thirty minutes capturing steam that creates a chewy shiny crust then remove the lid and continue baking fifteen to twenty minutes until deeply golden and hollow sounding when tapped. Let the bread cool fully before slicing for best texture
 Bookmark
This recipe reminds me of sharing warm slices with butter on rainy afternoons when my kids would eat half the loaf before dinner even began. I especially love the aroma when salt and yeast hit warm flour it feels instantly comforting and homey.
Storage Tips
Store any leftover bread tightly wrapped at room temperature for up to three days. For longer storage slice and freeze the loaf then toast straight from the freezer for fresh tasting bread at any time. Avoid refrigerating as it dries out the crumb faster
Ingredient Substitutions
If you cannot find all purpose flour bread flour can be used for a slightly chewier result. If your yeast is older increase the amount to three quarters teaspoon to be sure of a good rise. For flavor twists add dried herbs seeds or a handful of cheese to the dough before the first rise
 Bookmark
Serving Suggestions
No knead bread begs for good butter or a splash of olive oil but also makes an amazing base for sandwiches toast or brushed with garlic for an easy appetizer. I love serving cubes alongside soup or using thick slabs for pressed sandwiches
Cultural and Historical Context
This method draws inspiration from traditional European peasant breads which achieved light texture and flavor with only time and simple ingredients. The Dutch oven mimics the brick ovens used by bakers for centuries giving every home cook access to world class crust
Common Recipe Questions
- → What flour works best for this bread?
All-purpose flour is reliable, but bread flour can provide extra chewiness and structure.
- → Can I use instant yeast instead of active dry yeast?
Yes, both types work well in this dough. Use the same amount as specified for active dry yeast.
- → How do I prevent the bread from sticking to the pot?
Dust the pot with flour or line it with parchment paper before adding the dough to avoid sticking.
- → What if I don't have a Dutch oven?
A heavy, oven-safe pot with a lid works as an alternative, or use foil as a cover to trap steam.
- → How do I know when the bread is baked through?
The bread sounds hollow when tapped on the bottom or reaches an internal temperature around 200°F.
- → Is it important to let the bread cool before slicing?
Yes, cooling allows the crumb to set and makes slicing easier, keeping the interior soft and airy.