
 Bookmark
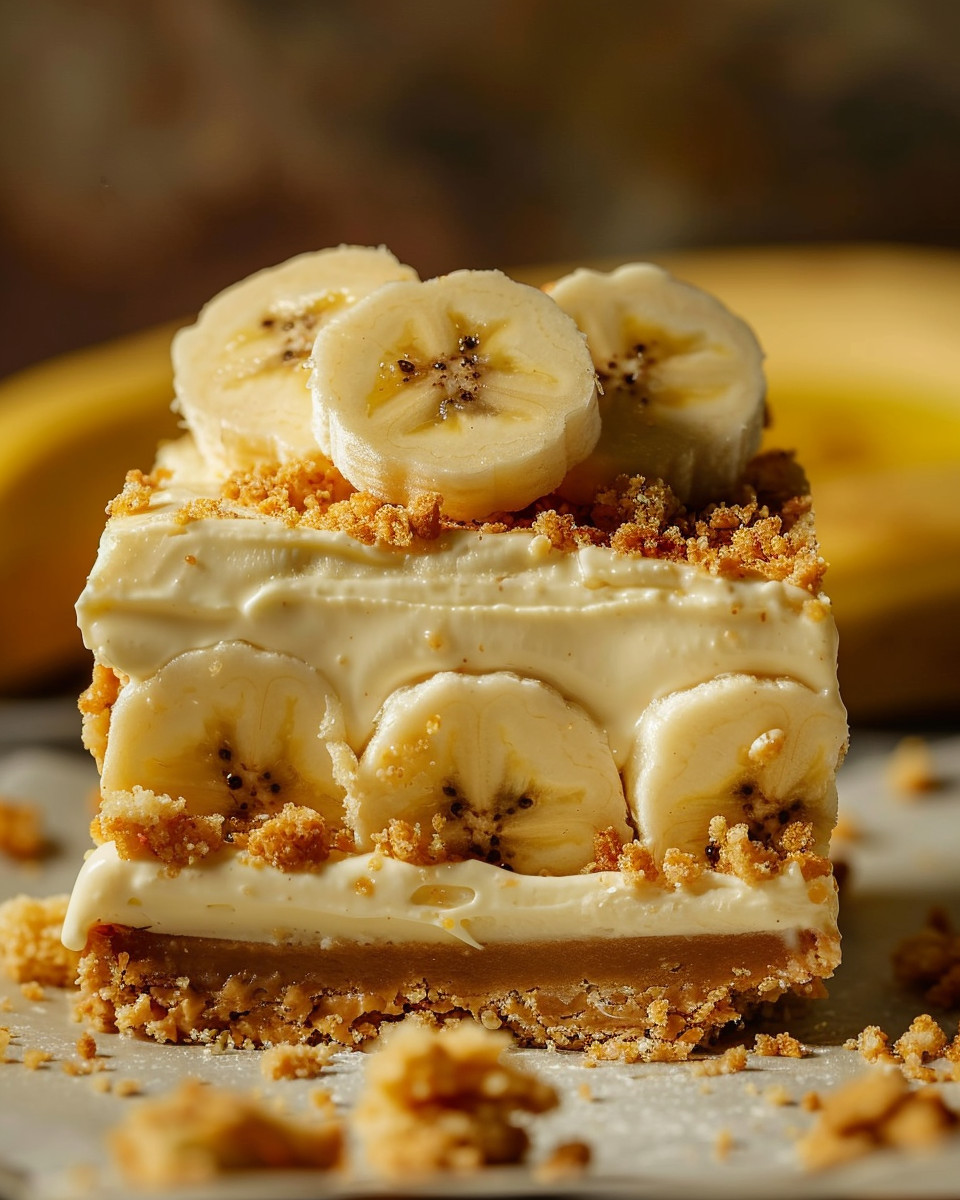
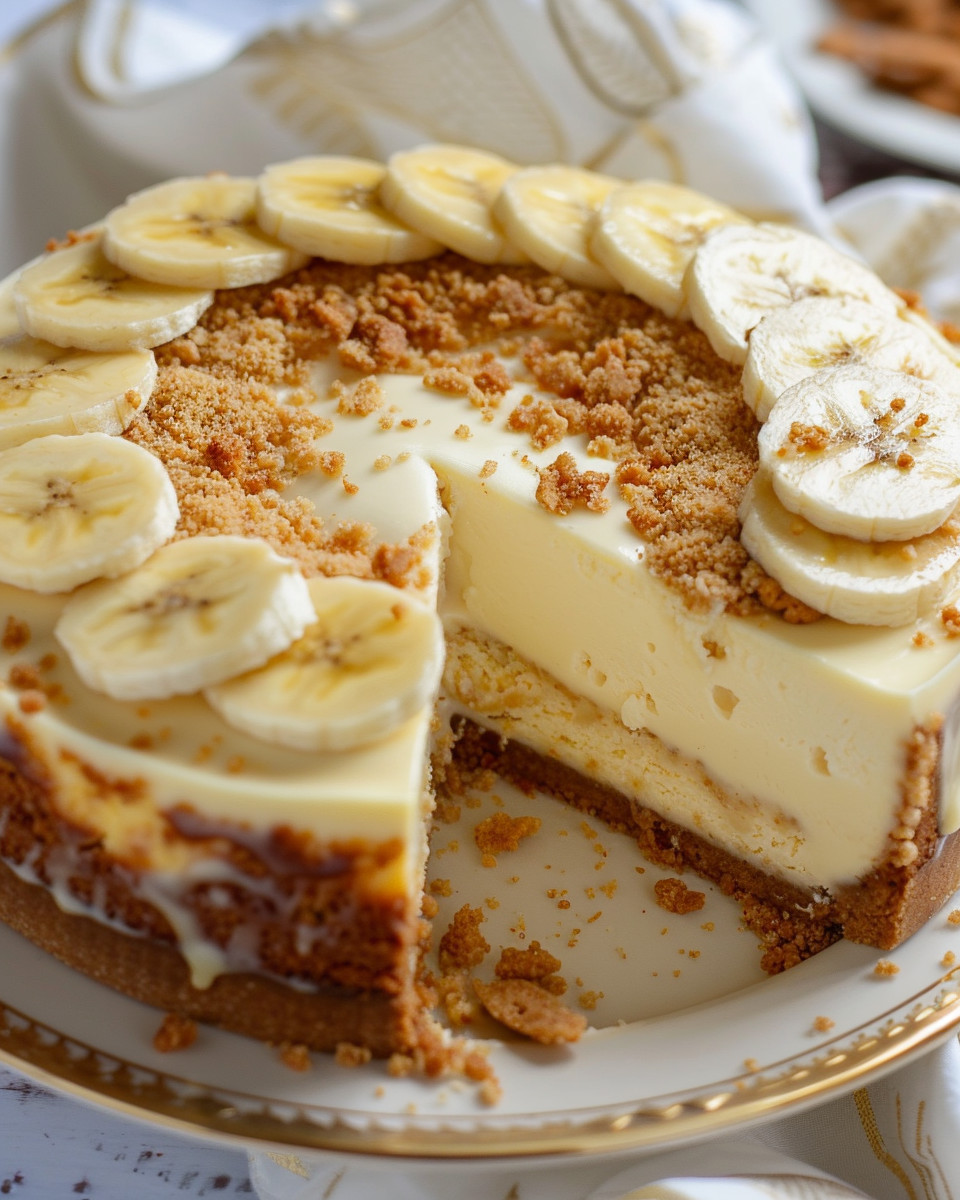
This No Bake Banana Pudding Cheesecake combines the nostalgic flavors of Southern banana pudding with the creamy richness of cheesecake. It is a refreshing treat that requires no oven and can be prepared ahead, making it ideal for warm weather and busy days.
I first made this cheesecake during a summer family reunion, and it instantly became the highlight of dessert time. Now anytime I want to capture that nostalgic banana pudding vibe with a creamy upgrade, this recipe is my go-to.
Ingredients
- Crushed vanilla wafer cookies: Two cups for the crust supplying that crunchy, buttery base, choose fresh wafers that snap cleanly
- Unsalted butter: Six tablespoons, melted to bind the crust adding richness without overpowering flavor
- Granulated sugar: Two tablespoons to sweeten the crust and give a slight caramel note
- Cream cheese: Two 8-ounce packages, softened for a smooth, luscious filling, full-fat is best for creaminess
- Granulated sugar: One cup sweetening the cheesecake filling evenly
- Vanilla extract: One teaspoon for warm aromatic depth
- Instant banana pudding mix: One 3.4-ounce box which provides authentic banana flavor and helps thicken the filling naturally
- Whole milk: One and a half cups cold to activate the pudding mix and bring silky texture
- Heavy whipping cream: One and a half cups, whipped to stiff peaks to lighten the cheesecake filling with airiness
- Bananas: Three medium ripe, sliced fresh for layering to balance richness
- Optional toppings: Whipped cream or store-bought whipped topping for extra lightness, plus crushed vanilla wafers and additional bananslices for garnish
Step-by-Step Instructions
- Prepare the Crust:
- Begin by crushing your vanilla wafers until you have fine crumbs resembling coarse sand. Combine these crumbs with melted butter and granulated sugar and mix well so everything is evenly coated. Press this mixture firmly into the bottom of a springform pan creating an even layer. Place in the refrigerator to chill for a minimum of 20 minutes to allow the crust to set firm.
- Make the Pudding Mixture:
- In a large bowl whisk the instant banana pudding mix together with the cold whole milk until the mixture is smooth and just starting to thicken. Set this aside so it can fully develop before combining with other ingredients.
- Whip the Cream:
- Chill a mixing bowl and beat the heavy whipping cream until stiff peaks form. This step adds essential lightness and airy texture that balances the cheesecake’s richness.
- Create the Cheesecake Base:
- In a separate large bowl, beat the softened cream cheese with sugar and vanilla extract until the mixture is fluffy and completely smooth. Slowly incorporate the prepared banana pudding mixture until fully combined. Finally, gently fold in the whipped cream with a spatula to keep the filling light and airy.
- Assemble the Layers:
- Pour about half of the cheesecake filling evenly over the chilled crust. Carefully add a layer of sliced bananas on top making sure they cover the filling. Spread the remaining cheesecake filling gently over the banana layer ensuring a smooth top.
- Chill to Set:
- Cover the assembled cheesecake with plastic wrap or a lid and refrigerate for at least six hours, or preferably overnight. This chilling time is crucial to allow the cheesecake to firm up perfectly and makes slicing clean and neat.
- Add the Finishing Touches:
- Just before serving, decorate the cheesecake with piped whipped cream or a dollop of whipped topping. Add extra banana slices and sprinkle crushed vanilla wafers over the top for a beautiful presentation and added texture.
 Bookmark
My favorite ingredient is the instant banana pudding mix because it delivers that authentic banana taste with no fuss. One of my fondest memories with this dish is sharing it with my grandmother who adored how I incorporated her classic flavors into a new form that everyone loved.
Storage Tips
Store any leftover cheesecake in an airtight container in the refrigerator to keep it fresh and creamy for up to three days. For best texture, avoid freezing as the bananas might turn mushy and the cream texture can change. If you want to prep components early, you can make the crust and pudding mixture a day ahead and assemble when ready.
Ingredient Substitutions
You can swap heavy whipping cream with store-bought whipped topping in a pinch. For a lower fat version try using reduced fat cream cheese and milk, but the texture will be less rich. If you cannot find vanilla wafers, graham crackers work as an alternative crust but will change the flavor profile slightly.
Serving Suggestions
This cheesecake is delightful on its own but pairs beautifully with fresh berries or a drizzle of caramel sauce for extra indulgence. It also complements iced coffee or sweet tea perfectly when served as a summertime dessert at gatherings.
Cultural and Historical Context
Banana pudding is a beloved Southern dessert dating back to the early 1900s, rooted in comfort and family gatherings. Transforming it into a no bake cheesecake pays homage to this tradition while adding a modern touch of creaminess that enhances its nostalgic flavors.
Pro Tips
- Make sure your cream cheese is fully softened at room temperature to ensure a smooth cheesecake filling without lumps
- Be gentle when folding the whipped cream into the filling to maintain the airy texture that makes this cheesecake special
- Chilling overnight is key, it allows flavors to meld and the cheesecake to set perfectly for clean slices and an elegant presentation
Common Recipe Questions
- → How do I make the crust crunchy?
Use finely crushed vanilla wafers mixed with melted butter and press firmly into the pan. Chilling solidifies the crust for a satisfying crunch.
- → Can I use fresh bananas in the layers?
Yes, sliced ripe bananas add natural sweetness and moist texture, enhancing the dessert’s flavor and freshness.
- → What’s the best way to achieve a light filling?
Whip heavy cream until stiff peaks form and gently fold it into the cream cheese and pudding mixture to keep the texture airy.
- → Is refrigeration necessary for setting?
Yes, chilling for at least 6 hours helps the layers firm up, ensuring clean slices and a smooth, creamy consistency.
- → Can I prepare this in advance?
Absolutely, this dessert holds well overnight, making it convenient for entertaining or ahead-of-time preparation.