
 Bookmark
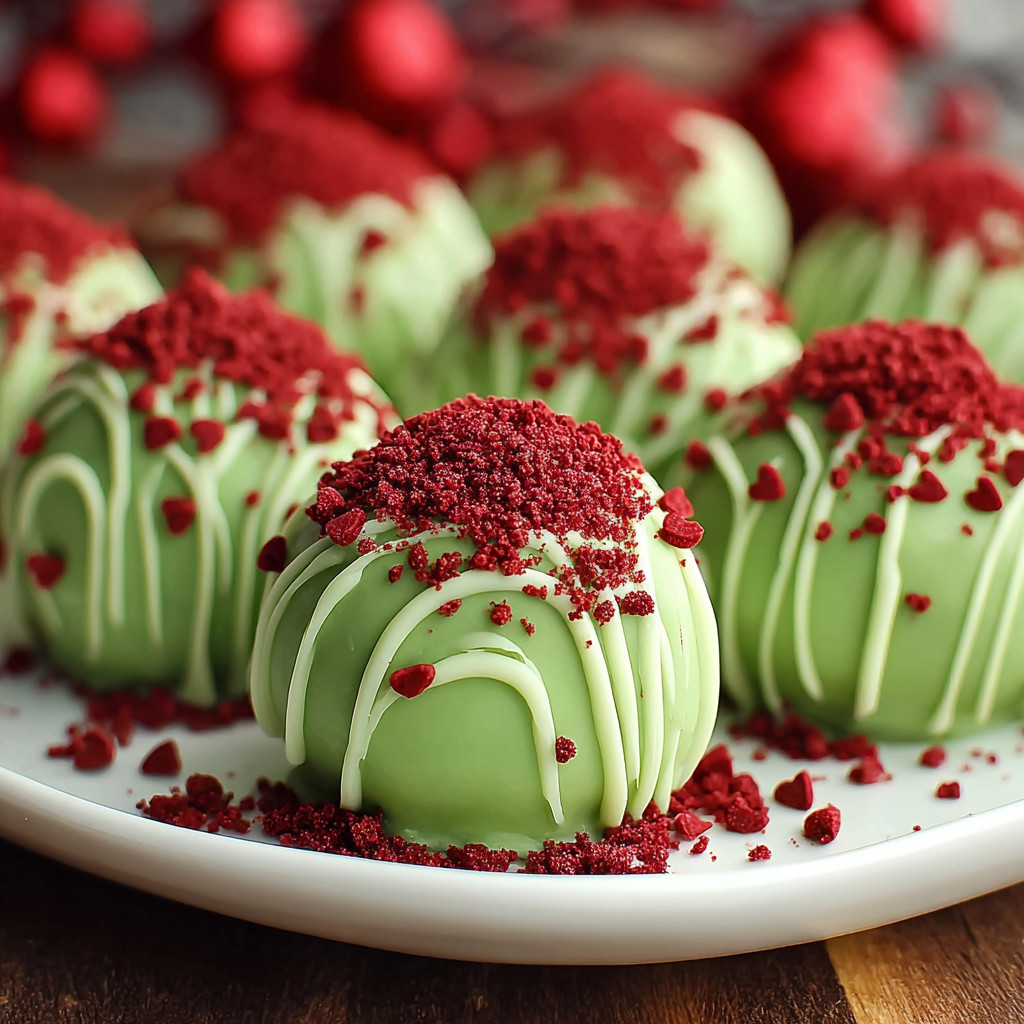
These Grinch Oreo Balls capture the holiday spirit with a fun and festive twist on a classic no-bake treat. Combining the rich flavor of Red Velvet Oreos with creamy softened cream cheese and encased in bright green candy melts, they are both visually striking and delicious. Perfect for Christmas parties or easy holiday treats for kids, these Oreo balls bring warmth and whimsy to any gathering with their playful design and classic sweet taste.
I first made these during a Christmas party and was amazed how quickly they disappeared. Now they are a yearly tradition that everyone looks forward to.
Ingredients
- Red Velvet Oreos: forty-four cookies provide a unique tangy richness and the base cookie crumb texture, try to pick fresh cookies for optimal flavor
- Cream Cheese: eight ounces softened, acts as a binder and makes the mixture creamy and easy to shape, using full-fat cream cheese gives the best texture
- Light Green Candy Melts: fifteen ounces, ensures a smooth vibrant coating reminiscent of the Grinch’s color, quality melts melt smoothly without clumping so choose a trusted brand
- Red Candy Hearts: add a charming finishing detail symbolizing the Grinch’s growing heart, look for small, firm candy decorations that hold up well on the coating
- Parchment paper: for lining the tray and easy cleanup, select good quality to prevent sticking
Step-by-Step Instructions
- Preparation Setting Up the Workspace:
- Prepare your workspace by lining a large baking tray with parchment paper to prevent sticking. Gather all your tools including a food processor or bag and rolling pin for crushing Oreos, an electric mixer for blending cream cheese and crumbs, and a cookie scoop or spoon for portioning. Organizing everything ahead makes the process smooth and enjoyable.
- Crushing the Oreos:
- Place Red Velvet Oreos in a food processor and pulse until you have fine crumbs with no large chunks. If a food processor is unavailable, place the cookies in a sturdy zip-lock bag and crush with a rolling pin until finely ground. The uniform crumb size is important so the mixture sticks well.
- Mixing the Ingredients:
- Place softened cream cheese in a large bowl and beat on high using an electric hand mixer until creamy and smooth. Gradually add the Oreo crumbs and mix until fully combined, forming a moist dough-like mixture. It should be sticky enough to hold but not wet. Adjust with extra crumbs or cream cheese if needed for the right consistency. Mixing just until combined prevents a dense texture.
- Shaping and Chilling the Balls:
- Using a one and a half inch cookie scoop, portion the mixture into even balls. Roll each ball between your palms to smooth the shape then place on the parchment paper-lined tray. Chill in the refrigerator for a minimum of two hours to firm up. Alternatively, freeze for thirty minutes but avoid full freezing to prevent cracking when dipping.
- Melting the Candy Melts:
- To melt candy melts gently, use a double boiler by placing them over simmering water and stirring constantly until smooth. Avoid water contact with the melts to prevent seizing. If you use a microwave, heat in short thirty second bursts on low setting, stirring between each session. The candy should be smooth and slightly thick but pourable.
- Dipping and Decorating the Oreo Balls:
- Using a fork or toothpick, dip each chilled Oreo ball into the melted candy coating. Tap gently to remove excess coating and place back on parchment. If the candy thickens during dipping, gently reheat to maintain fluidity. For decoration, drizzle extra melted candy over the balls with a piping bag or spoon and immediately press one red candy heart on top. Chill again until coating sets completely.
 Bookmark
Storage Tips
Store finished Oreo balls in an airtight container in the refrigerator to keep the coating firm and filling fresh. Avoid stacking them to prevent damage to the candy shell. They keep well for up to one week. For longer storage, freeze the prepared mixture balls before dipping. Thaw completely in the refrigerator before coating and decorating to avoid cracking of the candy shell.
Ingredient Substitutions
If Red Velvet Oreos are unavailable you can substitute with traditional Chocolate Oreos or special holiday flavors like Peppermint or Golden Oreos for an interesting twist. Instead of light green candy melts, white chocolate colored with oil-based green food coloring works well but requires careful melting to avoid seizing. Cream cheese is best full-fat for texture, but reduced fat versions can be used with slight adjustments in moisture. Red candy hearts can be swapped for small red sprinkles or edible red decorations.
Serving Suggestions
These bright and festive Oreo balls shine when arranged on a Christmas-themed platter or in small paper cups. Pair them with hot cocoa or holiday punch for a cozy treat experience. They work wonderfully as edible gifts wrapped in clear cellophane tied with ribbon. For parties, place them near other holiday cookies to create a colorful dessert spread. Adding crushed candy canes or sprinkles on top before coating sets can add extra texture and festivity.
Cultural and Historical Context
Oreo balls are a modern twist on the traditional truffle concept made popular in home baking communities for their simplicity and delicious flavor. Using themed Oreos like Red Velvet and holiday colors ties this recipe into Christmas traditions that celebrate playful and visually appealing treats. The choice of the Grinch theme comes from Dr. Seuss’s classic story “How the Grinch Stole Christmas,” filmed and loved as a holiday staple, making these treats both nostalgic and timely.
Pro Tips
- Always chill the Oreo balls thoroughly before dipping to avoid cracking in the candy coating
- Use a gentle melting method such as a double boiler to keep candy melts smooth and shiny
- If mixture is too sticky to roll add more crushed Oreos gradually for easier handling
Common Recipe Questions
- → Can I use regular Oreos instead of Red Velvet?
Yes, regular Oreos or other flavors like Peppermint or Golden work well. They change flavor notes but maintain the texture of the balls.
- → How should I store these treats?
Keep them in an airtight container in the refrigerator, maintaining freshness and candy coating firmness for up to a week.
- → Is freezing an option for these balls?
Absolutely. Freeze before coating for up to three months. Thaw in the fridge before dipping to prevent coating cracks.
- → Why might my candy coating crack or look uneven?
Coating issues usually arise from chocolate being overheated or treats being too cold. Use gentle heating and avoid freezing the balls solid before dipping.
- → What if I can’t find light green candy melts?
Use white chocolate with oil-based green food coloring to avoid seizing. This provides a smooth, vibrant coating alternative.