
 Bookmark
French creme brûlée has always felt special to me. The silky vanilla custard topped with a glassy layer of caramelized sugar brings a little luxury to any occasion. With simple ingredients and a straightforward process, this French classic transforms pantry staples into a showstopping dessert. You can make these ahead for dinner parties or just treat yourself with a spoon-cracking moment at home.
I started making creme brûlée for family birthdays because it feels so elegant yet is actually forgiving. Now my friends beg me to bring it for every potluck just for that crackly sugar.
Ingredients
- Egg yolks: Provide a custardy base and rich flavor. Use the freshest eggs possible for the creamiest texture
- Heavy cream: Is what creates that indulgent velvety finish. Look for heavy whipping cream on the label
- White granulated sugar: Sweetens the custard. Fine sugar will incorporate cleanly with the eggs
- Turbinado sugar: Is perfect for the topping since it stays crisp after torching. If needed, substitute with granulated sugar
- Vanilla bean: Brings deep, nuanced fragrance. If not available, use vanilla extract or vanilla bean paste
- Salt: Gives balance and highlights the sweet vanilla notes. Even a pinch makes a difference
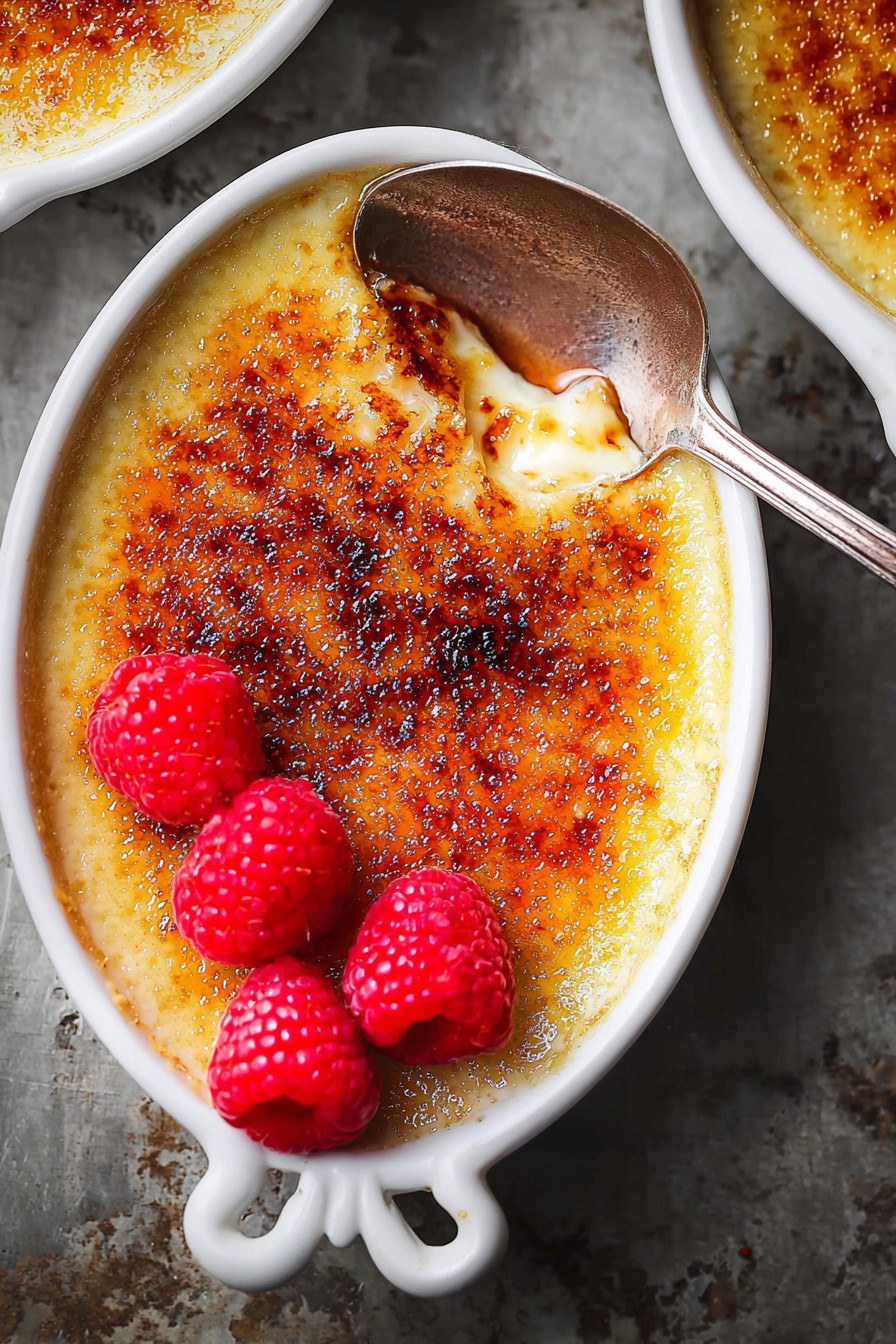
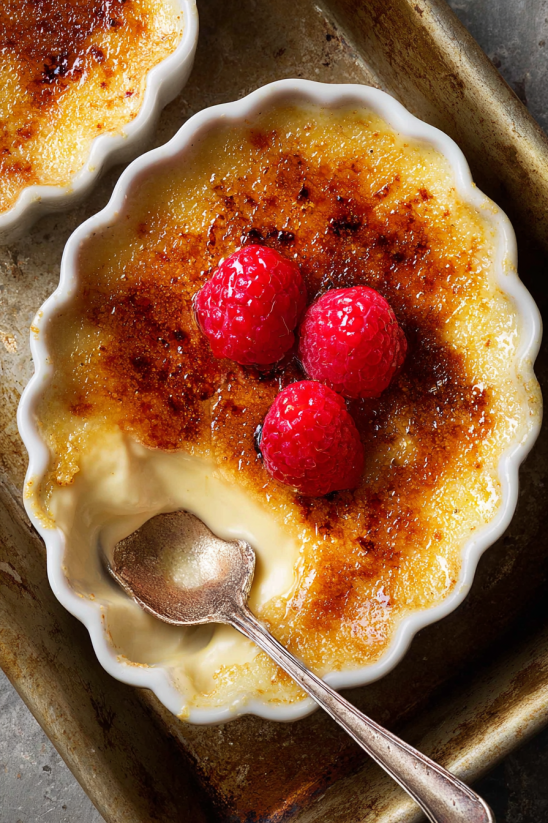
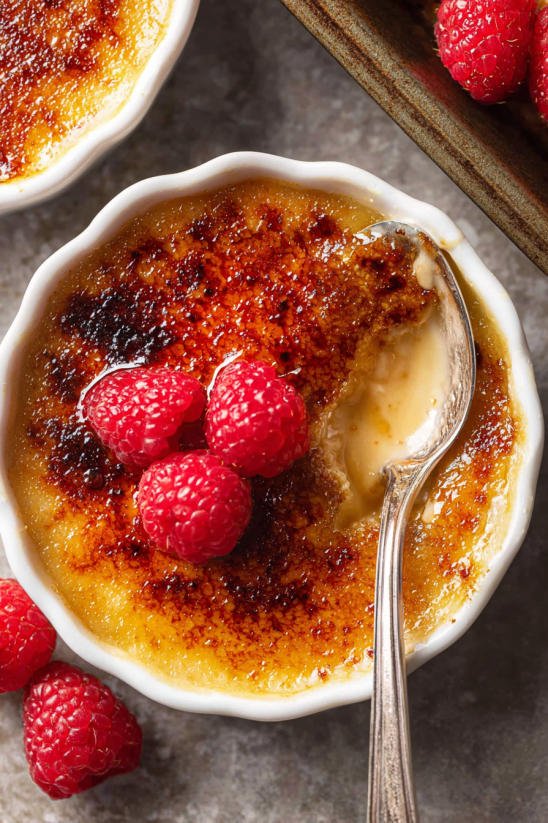
- Fresh fruit: Especially raspberries or strawberries brighten each bite. Choose fruit that smells fragrant and feels just barely firm
Step-by-Step Instructions
- Prepare the Equipment:
- Arrange your ramekins in a sturdy roasting pan so they do not touch. This keeps them from wobbling and makes pouring water around them easier
- Infuse the Cream:
- Pour heavy cream into a medium saucepan. Split a vanilla bean down the middle and scrape out its seeds adding both seeds and pod into the cream. Gently heat until steaming then remove from heat and let the mixture sit for ten minutes. This step lets the vanilla fully perfume the cream
- Mix the Egg Yolks and Sugar:
- Separate your eggs saving just the yolks in a medium bowl. Whisk in the sugar and salt vigorously until the yolks look thicker and turn a pale yellow. This dissolves the sugar and builds a base for the custard
- Temper the Egg Mixture:
- Remove the vanilla pod from the warm cream. Slowly pour a small amount of hot cream into the egg mixture whisking as you go. Continue this process gradually until all cream is incorporated. This gentle approach prevents scrambling the eggs
- Strain the Custard:
- Pour the custard base through a fine mesh strainer into a large measuring cup to catch any curdled bits or pods. This ensures the smoothest baked custard possible
- Fill the Ramekins:
- Carefully pour the strained custard into your ramekins dividing evenly. If you notice bubbles on the surface gently fan them off with a kitchen torch or pop them with a toothpick
- Bake in a Water Bath:
- Place the roasting pan with ramekins on your oven rack. Pour hot water into the pan about two-thirds the way up the sides of the ramekins. Bake at 300 degrees Fahrenheit until the custards are just barely set around the edges and jiggle in the center. Usually twenty-five to thirty minutes for shallow ramekins and up to fifty minutes for taller ones
- Chill Completely:
- Remove ramekins from water and cool to room temperature. Then transfer to the refrigerator for at least four hours or overnight. Proper chilling is key for that classic texture
- Caramelize the Sugar Crust:
- Before serving sprinkle each custard with a thin layer of turbinado sugar. Use a kitchen torch to melt and caramelize the sugar until dark golden and glassy. Let rest a minute to harden then top with fresh berries
 Bookmark
Every time I use a real vanilla bean the aroma reminds me of Sunday afternoons baking with my grandmother. There is nothing like freshly scraped vanilla in a creamy dessert. The memories of cracking into the very first sugar lid at the table still make me smile
Storing French Creme Brûlée
Keep the baked and chilled custards covered in the refrigerator for up to four days. Always wait to torch the sugar topping until right before serving because the caramel crust will turn sticky if left too long. If you have leftovers with the sugar topping already on the custard gently blot off excess moisture and eat soon for the best taste
Ingredient Swaps and Tips
For an extra budget friendly version use pure vanilla extract instead of whole beans but look for real extract not imitation
If you do not have turbinado sugar granulated works but the crust will be slightly thinner
You can try coconut sugar for a deeper toffee note but it burns faster so watch closely while torching
 Bookmark
Serving Suggestions
Place each ramekin on a small plate with a few fresh berries
For an elegant look add a little edible flower or mint sprig on top
Serve with espresso or a chilled glass of dessert wine for the ultimate finish to a meal
Creme Brûlée’s French Roots
Creme brûlée has been loved in France for centuries but its precise origins are debated. Some say it began in the kitchens of royal palaces while others trace it to a university tradition in Cambridge England where it is called Trinity Cream. Wherever it began its beauty is in that magical contrast between cool custard and crackly sugar
Common Recipe Questions
- → What creates the signature creme brûlée top?
The classic crisp top comes from sprinkling turbinado sugar over chilled custard and caramelizing it with a kitchen torch for a golden, crackly finish.
- → How should creme brûlée be served?
Serve with a warm, caramelized top and cold custard underneath. Chill the custard for at least 4 hours before torching and serving.
- → Is it possible to make without a torch?
Yes, you can caramelize the sugar under a broiler if a torch isn’t available. Ensure the custard is thoroughly chilled before broiling.
- → What are the key ingredients?
Essential components include heavy cream, egg yolks, granulated and turbinado sugar, vanilla bean or extract, salt, and an optional garnish of fresh berries.
- → Can it be made ahead?
Absolutely! Prepare and chill the custards up to 3 days in advance. Caramelize the sugar topping just before serving for best texture.
- → How do you achieve a smooth custard?
Cook the custard in a water bath at a low temperature and strain before baking to ensure a silky, creamy texture every time.