
 Bookmark
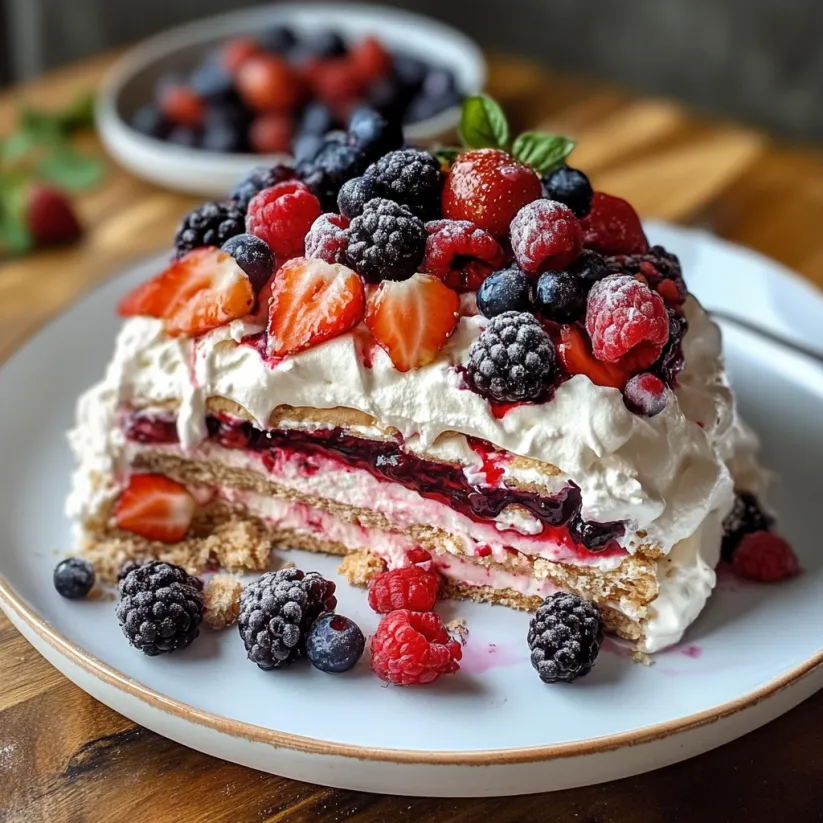
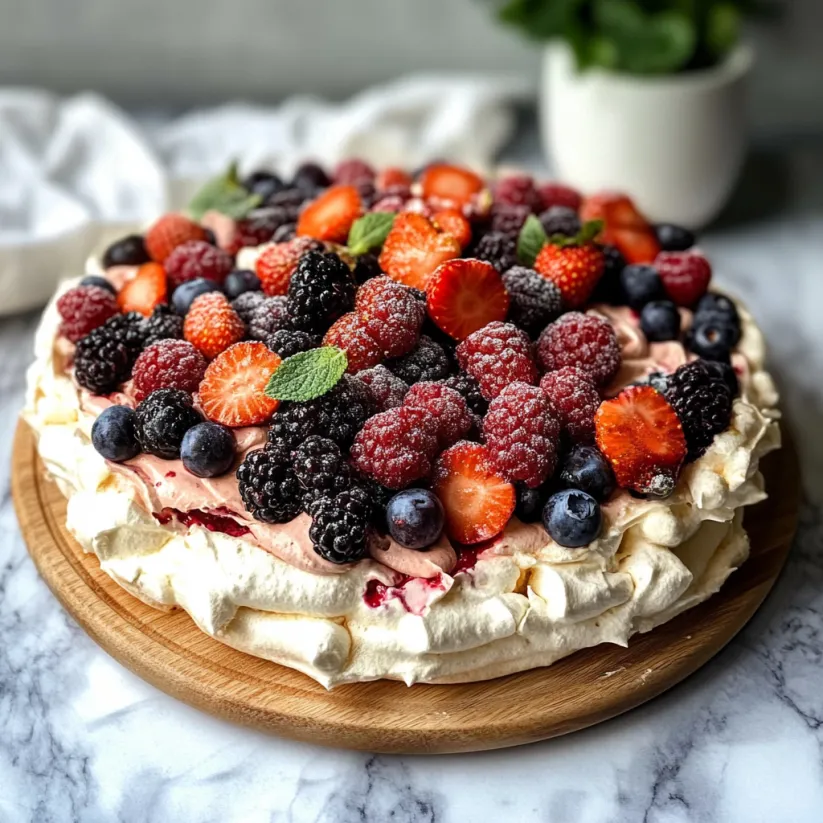
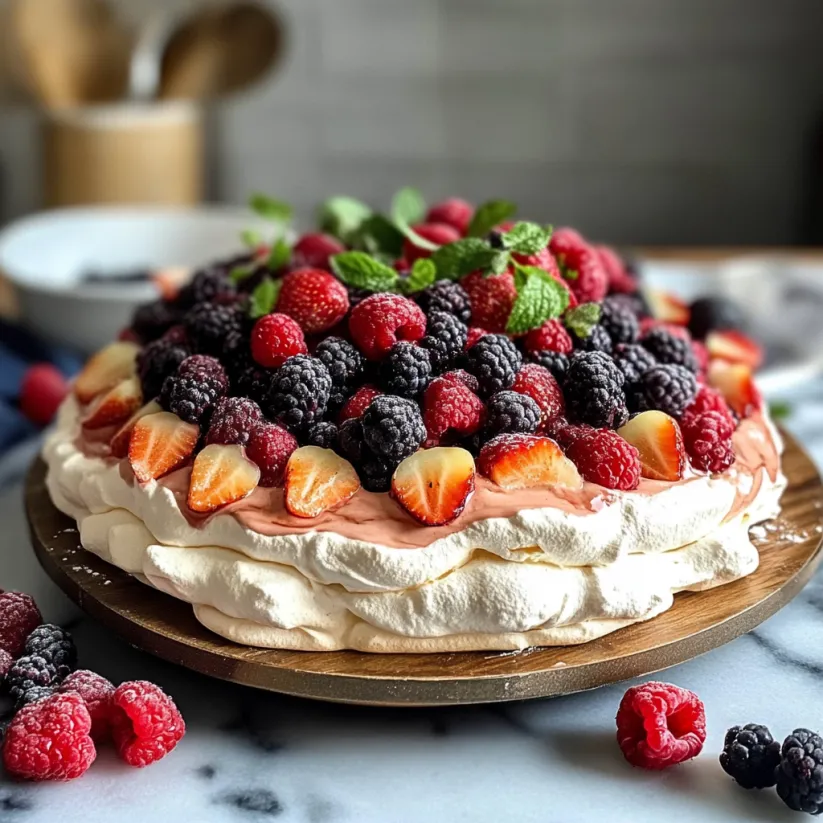
A slice of this double stacked berry pavlova cake brings a celebration to any table The dreamy contrast of crunchy shell and fluffy marshmallow center belongs at every joyful gathering With clouds of whipped cream and plenty of fresh berries on top this dessert looks like it took hours but comes together with just a few simple ingredients
When berries are in season I make this for every family birthday The first time I brought it to a picnic my friends could not stop talking about the clouds of meringue and sweet berries
Ingredients
- Egg whites: fresh from large eggs will whip to stronger peaks
- White sugar: gives the meringue its glossy texture and crunch
- Vanilla extract: boosts the flavor and rounds out the sweetness find a pure extract for best taste
- Lemon juice: stabilizes the egg whites while adding brightness fresh lemon juice works best
- Cornstarch: creates the signature marshmallowy interior check for a smooth fine powder
- Optional heavy whipped cream: for the ultimate soft topping
- Fresh fruit: for color and tartness I love a mix of raspberries blueberries and strawberries
Step-by-Step Instructions
- Separate the Eggs:
- Use cold eggs to make separating easier Crack and divide whites from yolks making sure there is no trace of yolk in the bowl This ensures your meringue whips up perfectly
- Whip the Meringue:
- With the egg whites in a clean mixing bowl start beating at medium speed Beat until the whites look foamy then start adding sugar a spoonful at a time Keep beating until the mixture forms stiff glossy peaks This means the whites hold firm but look shiny and smooth Test by turning the bowl upside down Nothing should move
- Fold in Flavor Boosters:
- Gently sprinkle in the cornstarch vanilla and lemon juice Use a rubber spatula to carefully fold them into the meringue Take care to keep as much air in the mixture as possible
- Shape and Bake:
- Heat your oven to 290 degrees Fahrenheit Line a baking sheet with parchment paper Choose to spoon the meringue into two even circles or pipe them into shapes Trace guides on the paper if you want a layered cake Look for even thickness so the cakes bake consistently
- Bake Without Peeking:
- Place the pans in the oven and bake for one hour The meringue will build its crust without browning Do not open the oven as sudden air will make the layers collapse
- Cool in Oven:
- After baking turn off the heat and leave the pavlova inside the oven to cool fully This prevents cracks from sudden temperature changes Let it rest for at least a few hours or overnight
- Assemble and Top:
- Once cooled gently peel off the parchment Place one pavlova on a platter Top with whipped cream and a tumble of fresh berries Place the second pavlova on top Decorate with even more whipped cream and berries for a festive look
 Bookmark
My absolute favorite part is sneaking a spoonful of whipped cream and meringue with tart blackberries at midnight It tastes like summer memories and laughter around the table One year my niece helped layer the berries and she covered every inch with strawberries just to make it extra berry filled
Storage Tips
Once assembled pavlova is best eaten the same day as the cream and fruit will start to soften the crisp meringue Store any leftovers in the fridge and eat within twenty four hours For make ahead you can bake the meringue layers a day in advance Store them in an airtight container at room temperature until you are ready to add toppings
Ingredient Substitutions
If you prefer a less sweet dessert replace some of the sugar with superfine sugar which dissolves more smoothly Dairy free whipped topping can be used for those with an intolerance Lemon juice can be replaced with white vinegar in a pinch but lemon gives the best taste For fruit frozen berries can work when fresh is not available just thaw and pat dry
Serving Suggestions
Serve each portion with extra fruit or a drizzle of berry coulis Dress up each slice with a sprig of mint For special occasions dust the top with a sprinkle of powdered sugar or add edible flowers Pavlova makes a beautiful birthday cake or a stunning finish to a brunch
 Bookmark
The Story of Pavlova
This dessert originated in the early twentieth century as a tribute to the famous Russian ballerina Anna Pavlova Though Australia and New Zealand both claim its creation the combination of airy meringue and fresh fruit has become beloved world wide It is a symbol of lightness and celebration especially in the summertime
Common Recipe Questions
- → How can I achieve a crisp outer shell and soft interior?
Start by slowly beating egg whites and gradually adding sugar until stiff, glossy peaks form—this creates the signature texture. Baking at a low temperature helps set the exterior without drying the inside.
- → What fruit pairs best with this dessert?
Fresh berries like raspberries, strawberries, and blueberries work beautifully, offering a vibrant contrast to the sweet meringue and creamy topping.
- → Why let the pavlova cool in the oven?
Allowing it to cool slowly in the oven prevents cracks and helps maintain the marshmallow-like center beneath the crisp crust.
- → Can I make components ahead of time?
The baked pavlova base can be made in advance and stored in an airtight container, but it's best to add cream and fruit topping just before serving for optimal texture.
- → How do I cut and serve this dessert?
Use a sharp, serrated knife to gently slice through the crisp layers, ensuring each piece includes both meringue and topping.