
 Bookmark
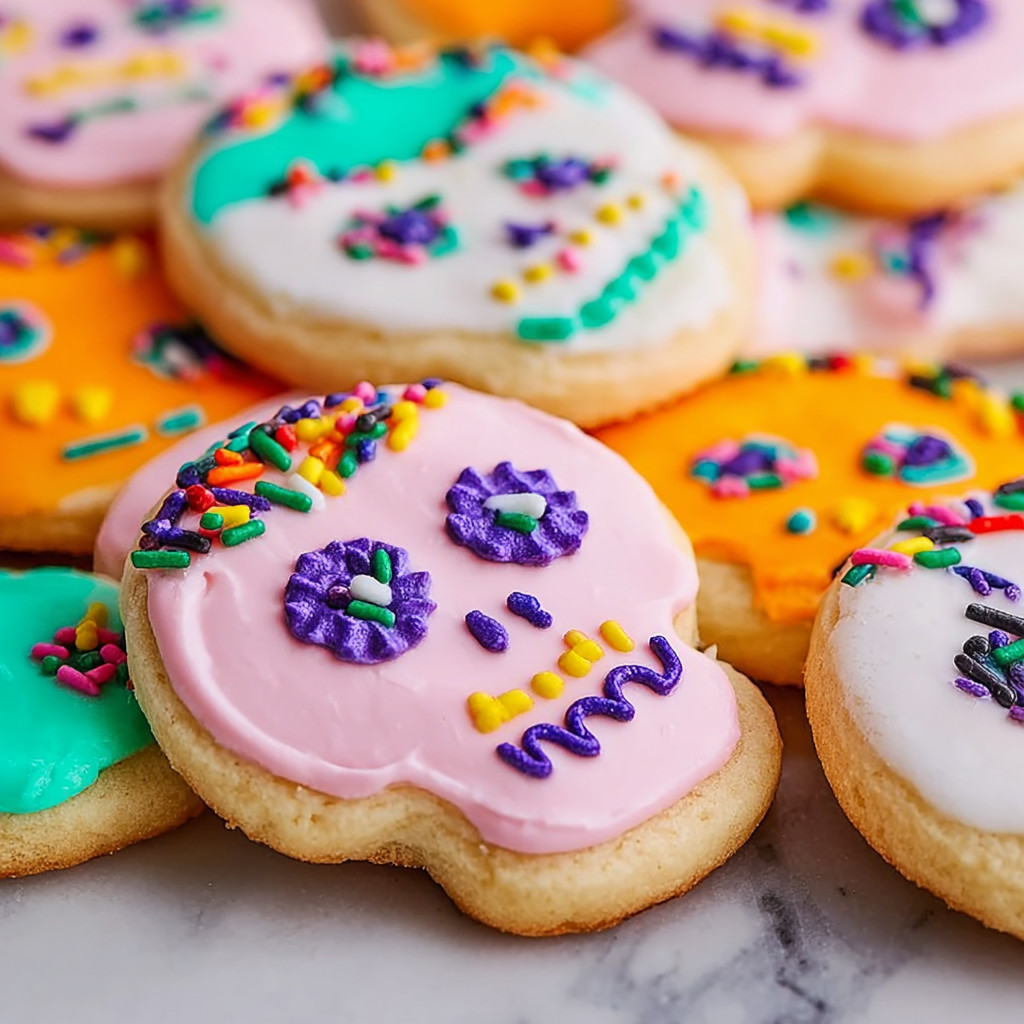
Day of the Dead sugar cookies are my favorite way to bring color and meaning to the Día de Muertos table. The sturdy dough holds intricate skull shapes for decorating, and the royal icing is forgiving enough for cookie artists of any skill level. Whether you make them alone as a quiet remembrance or gather friends for a decorating party, these cookies offer a sweet and joyful way to honor loved ones.
I have made these cookies every November since college and it always turns into a celebration. There are always friendly arguments over which cookie is the wildest or most beautiful and not one ever looks just like the others.
Ingredients
- All-purpose flour: You want unbleached flour for the best flavor and an even crumb. Sift before measuring if it looks clumpy for a smooth dough
- Baking powder: Gives a gentle lift and ensures tender cookies. Fresh baking powder will help your dough rise evenly
- Kosher salt: Highlights flavors and balances the sweetness. Taste a pinch first and make sure it is pure and clean
- Butter: Use unsalted for best control over the saltiness. If you only have salted, leave out added salt
- Granulated sugar: Gives the perfect level of sweetness and holds structure during baking
- Large egg: Binds the dough and adds richness. Room temperature eggs mix in best
- Milk: Helps the dough come together and later smooths the icing. Any unflavored milk will work
- Pure vanilla extract: Adds warmth and depth to both dough and icing. Choose a real vanilla for the best aroma
- Powdered sugar: Creates smooth, glossy icing. Sift if lumpy for clean piped lines
- Light corn syrup: Essential for shiny and firm icing that sets fast. Check the bottle date for freshness
- Black teal orange green purple yellow food coloring: Pick high-quality gels or pastes for vibrant color without watering down the icing
Step-by-Step Instructions
- Mix the dry ingredients:
- In a large bowl whisk together the flour baking powder and salt until well combined. This ensures even rising and flavor in every bite
- Cream the butter and sugar:
- In a second bowl beat the softened butter with the sugar for at least three minutes until fluffy and pale. The texture should be soft and billowy which helps give your cookies lift
- Add wet ingredients:
- Beat in the egg milk and vanilla until completely smooth. Scrape the bowl so everything mixes evenly
- Combine dough:
- Gradually add the flour mixture to the wet base. Mix just until no flour streaks remain for a soft but not sticky dough
- Chill the dough:
- Shape dough into a flat disk and wrap tightly in plastic. Chill for one hour to help the flavors meld and make rolling easier
- Roll and cut shapes:
- On a lightly floured surface roll your dough to an even eighth inch thickness. Use skull cutters or any festive shapes and transfer each piece to a parchment lined baking sheet. Freeze the cut cookies for ten minutes to keep sharp edges during baking
- Bake:
- Bake in a 350 degree oven for ten to twelve minutes until the edges just turn golden. Do not overbake. Let them cool fully before decorating
- Make the icing:
- Whisk powdered sugar milk corn syrup and vanilla in a medium bowl until smooth and glossy. Set aside a small portion for outlining. The rest should be thinned with additional milk until it flows in a smooth ribbon for flooding the cookies
- Outline and flood:
- Transfer thicker icing to a piping bag fitted with a small round tip and carefully pipe the outlines of each cookie so the color stays inside. Then flood the centers with the thinned out icing filling right to the edges
- Color and decorate:
- Divide extra icing into six bowls and tint each with your chosen color. Place each shade in its own piping bag. Pipe designs faces flowers and details as wildly as you like. Let cookies dry fully so icing is set
 Bookmark
I always look forward to using vibrant gel colors for the icing. A kitchen full of color pots reminds me of decorating skull cookies with my cousins while my abuela played cumbia music in the background. Those laughter filled afternoons are my favorite family memory every November
Storage Tips
Keep the decorated cookies in a single layer in an airtight container at room temperature for up to five days. If stacking separate layers with parchment to preserve the designs. For longer storage freeze undecorated or fully iced cookies up to three months tightly wrapped and defrost at room temperature before serving. Dough can also be made ahead and refrigerated for several days or frozen in a double wrapped disk.
Ingredient Substitutions
If you do not have light corn syrup use honey though the icing may not set as firmly. Whole wheat flour creates a slightly nuttier dough if you swap up to half. Almond extract can be subbed for vanilla for a subtle marzipan flavor. For dairy free cookies use plant butter and your favorite milk alternative but check the dough texture as you may need a splash less.
Serving Suggestions
These cookies are beautiful on a Día de Muertos ofrenda among candles and marigolds. For parties pile them high on platters and let each guest customize their own skull design with extra bowls of icing and sprinkles. They pair perfectly with mugs of Mexican hot chocolate or cinnamon tea.
Cultural Context
Día de Muertos is a vibrant Mexican holiday celebrated every November first and second to honor those who have passed away. Sugar skull imagery is traditional as a joyful symbol that celebrates life and memory. These cookies capture the spirit of the festivities even if you’re far from home and bring a heartfelt connection to those you miss.
 Bookmark
Common Recipe Questions
- → How can I decorate Day of the Dead cookies?
Use a variety of food colorings in piping bags to create unique skull designs. Bright flowers, swirls, and dots are traditional options. Let your imagination lead and no two cookies need to be the same!
- → Should I use salted or unsalted butter?
Unsalted butter is recommended for better control of salt levels, but if using salted, simply skip any additional salt in the dough.
- → Can I prepare the dough ahead of time?
Yes, the dough can be made up to three days in advance and stored in the refrigerator, or shaped and frozen for later baking.
- → How do I get the icing to the right consistency?
For outlining, use thicker icing, and for filling, thin it with small amounts of milk until it flows but holds shape. Adjust as needed while decorating.
- → How long will decorated cookies stay fresh?
Stored in an airtight container, decorated cookies last about one week at room temperature or up to three months in the freezer.