
 Bookmark
The Taco Bell grilled cheese burrito has become a fan favorite for good reason. This homemade copycat recipe lets you recreate all that savory, cheesy, beefy goodness at home, with even more flavor than the original. It is perfect for treating yourself on the weekend, impressing friends, or just indulging your craving without the drive-thru line.
The first time I made this, my kids begged for seconds and my husband said it outdid the real thing We now make it together on Saturdays and everyone gets to load up their own burrito just the way they like it
Ingredients
- Ground beef: Gives the filling the classic rich and savory taste Try to choose fresh ground beef with good marbling for flavor
- Water: Helps dissolve the seasoning and create a saucy beef mixture Use filtered water if possible for clean taste
- Taco seasoning: Adds authentic Taco Bell flavor Look for the Taco Bell brand mix or your favorite taco blend
- Corn: Provides sweetness and juicy texture Frozen or canned both work well look for kernels that are deep yellow and firm
- Flour tortillas: Large burrito size is best as you need space for all the fillings Choose fresh soft tortillas for easy wrapping
- Mexican rice: Gives a seasoned starchy layer Pre-make or buy from the deli and always warm it up before assembling
- Roma tomatoes: Firmer and less watery than most tomatoes Chop them small to avoid soggy burritos
- Cheese dip: Canned nacho cheese brings classic taste You can make your own for extra richness
- Sour cream: Adds creamy tanginess Use full fat for the smoothest texture Greek yogurt works as a lighter swap
- Colby Jack cheese: Melts beautifully in and on the burrito Fresh shredded cheese gives best melt and flavor
- Tortilla strips: Provide extra crunch inside Use plain or spicy strips as you like
- Cilantro: Optional for garnish Fresh cilantro brings a burst of color and a hint of earthiness
Step-by-Step Instructions
- Make the Taco Meat:
- Set a large skillet over medium-high heat and add the ground beef Break it up with a spoon as it cooks until completely browned Pour in the water and sprinkle in the taco seasoning Stir well and let the mixture simmer for about five minutes until most liquid is gone and beef is saucy Stir in corn then remove from heat and set aside
- Warm the Tortillas:
- Place large flour tortillas on a microwave safe plate Heat in the microwave for a minute flipping halfway through so they are soft and pliable Alternatively warm in a dry skillet just until warmed but not crisp
- Fill the Burritos:
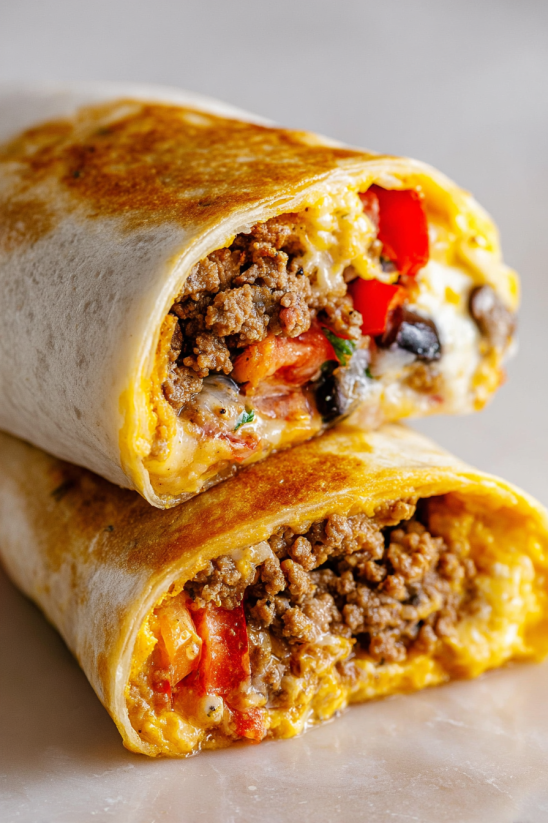
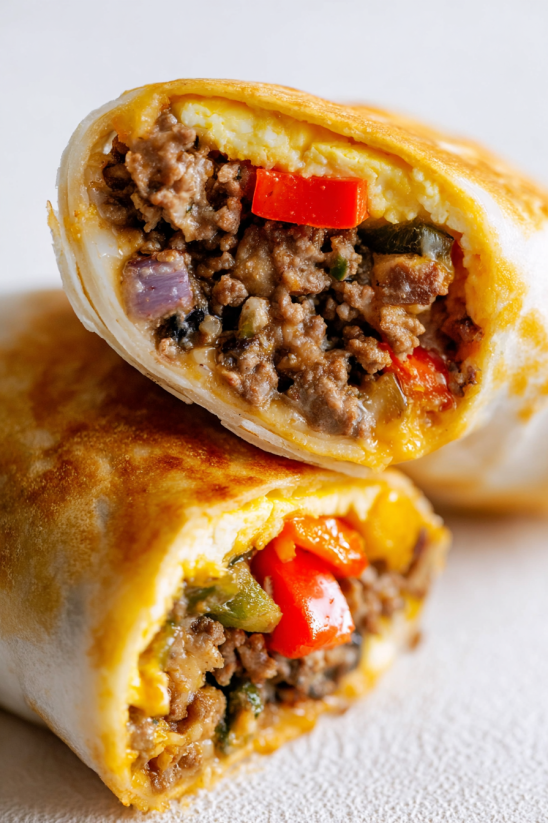
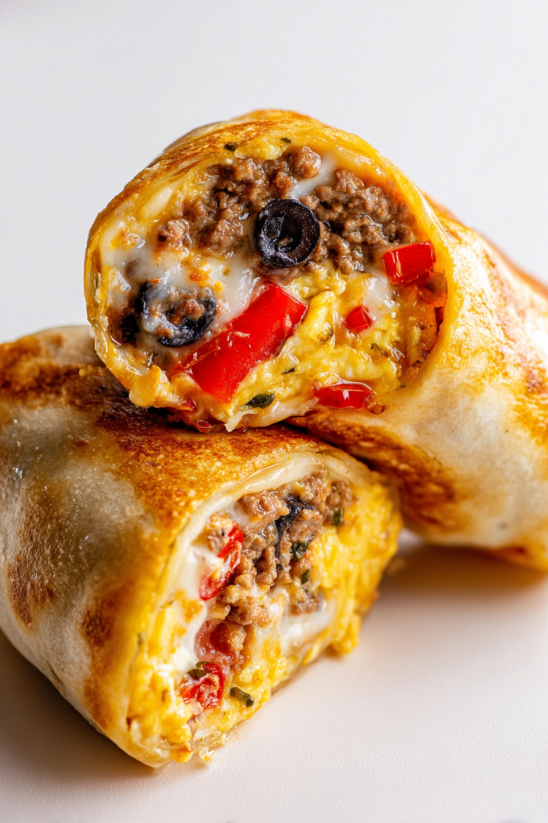
- Lay a warm tortilla flat Spoon some of the taco meat across the center leaving a generous border Add a layer of warm Mexican rice a few spoonfuls of chopped tomatoes cheese dip sour cream a handful of Colby Jack cheese and tortilla strips Stack the fillings for even distribution
- Roll Up the Burritos:
- Fold in the sides of the tortilla slightly over the filling Roll from the bottom upwards tucking tightly as you go so all the filling is sealed inside You want a snug burrito so the cheese layer can stick on later
- Wrap the Burritos in Cheese:
- Spray a large nonstick skillet with cooking spray Sprinkle a quarter cup of Colby Jack cheese in a pile on the skillet and let it melt until bubbling Place a burrito edge onto the melted cheese then gently roll so the cheese completely coats the outside Cook for another minute just until the cheese is golden and crisp Transfer to a plate and repeat with remaining burritos
- Garnish and Serve:
- Sprinkle chopped cilantro on top if you like Serve immediately while the cheese is hot and gooey on the outside
 Bookmark
The crunchy tortilla strips are my favorite addition They add such a fun texture My daughter always sneaks a few extras for her burrito and we love laughing about who had the crunchiest bite It turns a simple dinner into a little family competition
Storage Tips
Refrigerate leftover burritos in an airtight container for up to two days For best results reheat in the oven at three hundred fifty degrees Fahrenheit wrapped loosely in foil so the cheese gets melty again Freeze burritos by cooling them completely then wrapping tightly in foil Store in a freezer bag for up to three months Reheat straight from frozen in a hot oven until warmed through
Ingredient Substitutions
Swap ground turkey or plant based crumbles for the ground beef You can use shredded rotisserie chicken for a different take Greek yogurt works perfectly instead of sour cream Monterey Jack or cheddar cheese is great if Colby Jack is not available Add jalapenos or hot sauce inside for extra heat or swap the tortilla strips for crushed chips if needed
Serving Suggestions
These burritos are a meal on their own but I love pairing them with fresh guacamole crisp Texas caviar or simple street corn Chips and salsa work as an easy side Add a cold Mexican soda or horchata for a real treat
Cultural Context
Taco Bell first launched the grilled cheese burrito in twenty twenty and it quickly became a cult favorite for its over the top cheesy exterior The concept takes Tex Mex burrito basics and amps them up in a fun American fast food way Making them at home lets you enjoy this treat even when Taco Bell takes it off the menu and you can load it up just how you like
 Bookmark
Common Recipe Questions
- → What kind of cheese is best for the crispy cheese outside?
Colby Jack or a blend with cheddar works well due to their meltability and flavor, creating a perfect golden coating.
- → Can I make this burrito vegetarian?
Absolutely! Swap ground beef for black beans or seasoned tofu for a delicious meat-free version.
- → How do I keep the burrito from falling apart?
Warm tortillas before filling and avoid overstuffing. Make sure to fold the sides in before rolling tightly.
- → Is it possible to prep the filling ahead of time?
Yes, prepare the beef, rice, and other fillings in advance. Store in the fridge and assemble just before heating.
- → What sides go well with this dish?
Try with guacamole, Mexican street corn, Texas caviar, or classic tortilla chips for a full Tex-Mex meal.
- → How should leftovers be stored and reheated?
Keep leftovers in an airtight container in the fridge for up to two days. Reheat in the oven at 350°F until warm.