
 Bookmark
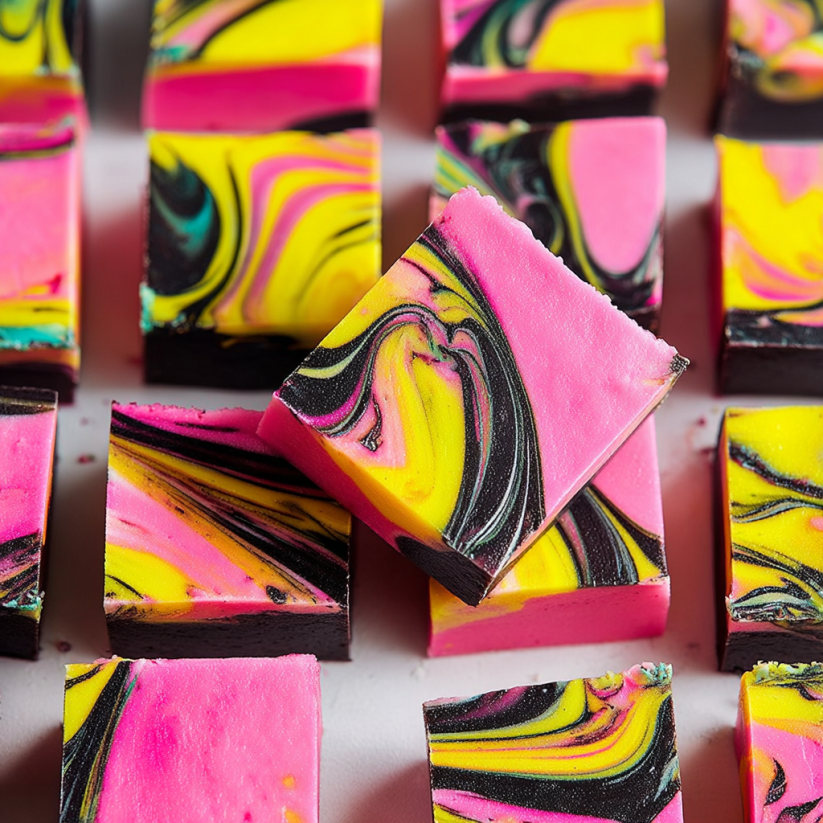
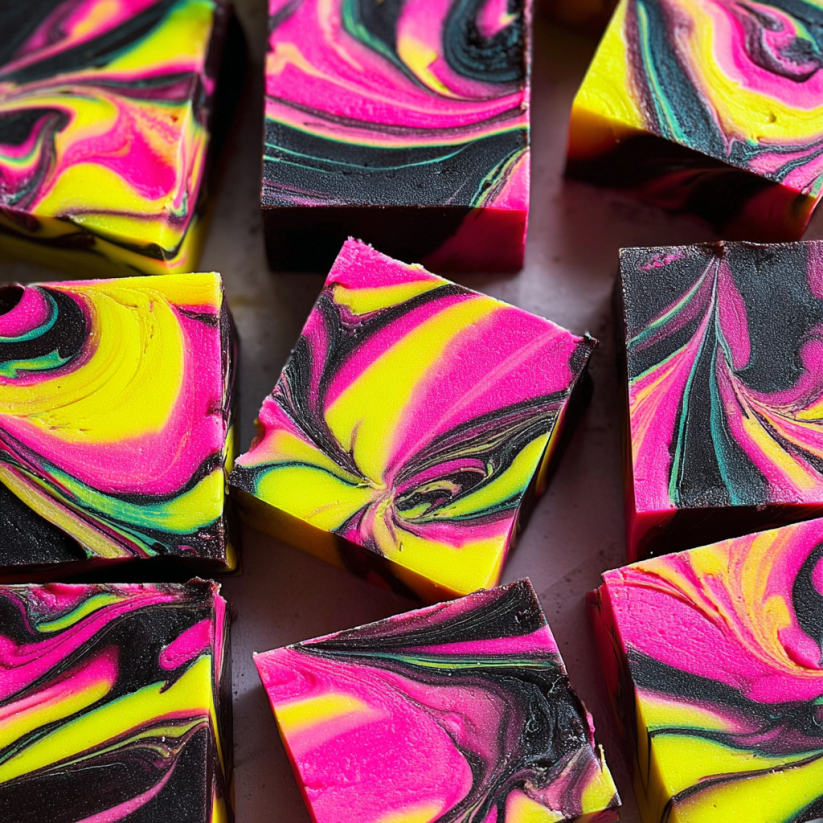
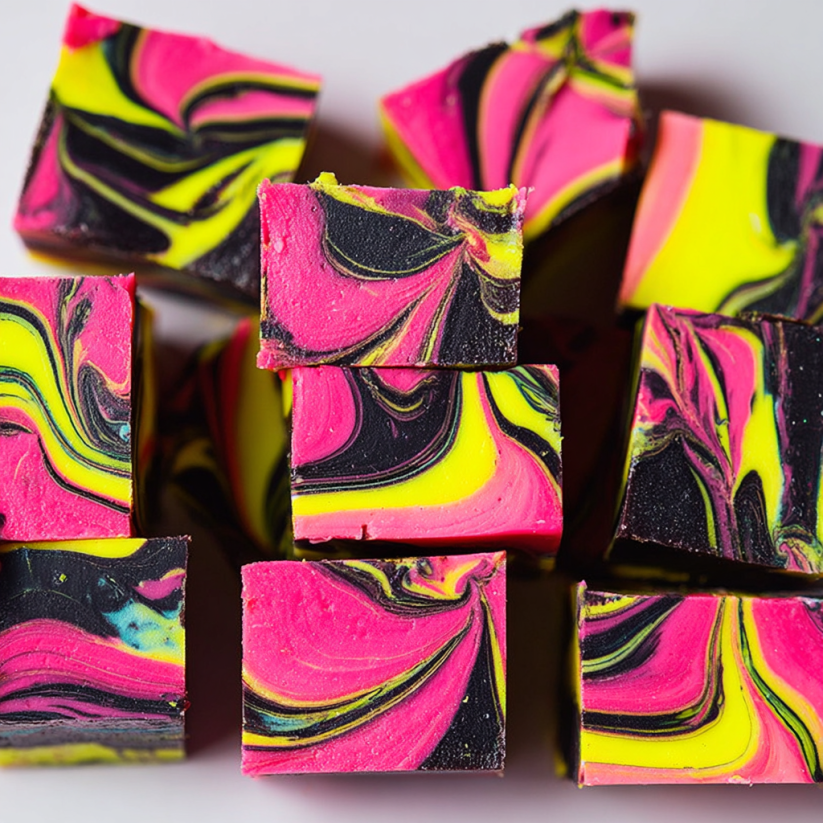
Nightmare Before Christmas Fudge is a playful and whimsical treat that manages to embody both Halloween and Christmas with its vibrant swirls and nostalgic flavor. This fudge brings together white chocolate and a pop of peppermint for a holiday feel, all beautifully tinted in shades that honor Sally Skellington’s patchwork dress. Whether you are whipping it up for a big Halloween bash or packaging squares for unique Christmas gifts, this recipe promises to be a conversation starter and a hit with kids and adults alike.
I first brought a pan of this to a friend’s Halloween party and it was completely gone before the night ended. Now my family looks forward to swirling up a batch as soon as October hits and again for winter celebrations.
Ingredients
- White chocolate chips: provide a creamy sweet base and melt smoothly in the pan. Look for chips with real cocoa butter for the best flavor
- Sweetened condensed milk: adds richness and helps the fudge set to just the right texture. Choose a good quality brand for the creamiest result
- Marshmallow Fluff: offers extra softness and a hint of vanilla flavor. You can omit if needed for allergies but I love the extra silkiness it gives
- Unsalted butter: gives body and a subtle richness. Always use unsalted so you can control the flavor yourself
- Vanilla bean paste or extract: brings out the chocolate and adds beautiful floral notes. Paste has little flecks that add visual interest but extract works just as well
- Peppermint extract: gives it a bright touch of holiday flavor. Pick pure extract for the best natural taste
- Gel food coloring in black pink yellow and teal: makes this fudge instantly recognizable and fun. Use gel instead of liquid so the colors stay vivid and do not water down the fudge
Step-by-Step Instructions
- Prep the Pan:
- Line an 8 inch square pan with two sheets of parchment paper that hang over all sides to make lifting out the fudge easy. Arrange them in a plus sign pattern for the most coverage and secure the overhang with binder clips if you like so it stays put while you work
- Melt the Chocolate and Milk:
- In a medium sized saucepan set over low heat combine the white chocolate chips and sweetened condensed milk. Stir occasionally until the chips are melted and the mixture turns completely smooth and lush. This usually takes about five minutes
- Add the Creamy Boosters:
- Now stir in the marshmallow Fluff the unsalted butter the vanilla bean paste and the peppermint extract. Keep the heat low and stir until everything is blended and just heated through. You know it is ready when it looks glossy and you see no streaks of marshmallow
- Color the Fudge:
- Quickly divide the hot fudge mix evenly among four bowls so you can color each one. Add a few drops of gel coloring to each bowl starting with black for one then tinting the others pink yellow and teal. Mix fast and thoroughly so the fudge stays soft and the colors come out bold
- Create the Swirl Effect:
- Drop alternating spoonfuls of each colored fudge into your prepared pan in a random pattern. Use a toothpick or a slim knife to gently swirl the colors together so you get that patchwork look but stop before it blends too much
- Chill Until Set:
- Slide the pan into the fridge and let the fudge chill for at least two hours. It should feel firm to the touch but not dry. You can cover and leave it overnight if you want to prep ahead
- Cut and Serve:
- Use the parchment overhang to lift out the whole slab of fudge and transfer it to a large cutting board. Slice the fudge into your preferred shape and size. I like a six by six grid for cute bite sized squares
 Bookmark
My favorite part about making this fudge is swirling the colors with my kids. They always try new designs and sometimes we even make extra for neighbors. It is a recipe that instantly reminds me of holiday movie nights and laughter in the kitchen
Storage Tips
Keep your fudge in an airtight container in the refrigerator for up to one week. If you need it to last longer wrap each piece in wax paper and freeze in a zip bag for up to two months. The colors will stay just as pretty
Ingredient Substitutions
If you need to skip the marshmallow Fluff the fudge will still set beautifully but have a slightly firmer bite. For a different flavor profile try swapping peppermint extract for almond or orange. You can use vegan butter and dairy free white chocolate chips to make a plant based version
 Bookmark
Serving Suggestions
Serve the fudge on a tray with black and white napkins for a full Nightmare Before Christmas theme. Add mini candy eyeballs or edible glitter for some spooky sparkle. I love packing squares in little gift boxes to bring a splash of color to cookie platters or party favors
Cultural and Holiday Inspiration
The swirling colors and peppermint hint mimic both Christmas and Halloween so you can lean into either theme. Inspired by the movie’s sense of whimsy and fun this fudge is a perfect edible tribute to the magic of Tim Burton’s storytelling and the nostalgia of fall and winter holidays
Common Recipe Questions
- → Can I omit the marshmallow fluff?
Yes, you can leave out the marshmallow fluff if you prefer or for egg allergy needs. The texture will be slightly less creamy but still delicious.
- → How do I achieve the distinct swirls?
After dividing and coloring your mixture, drop spoonfuls randomly into the lined pan, then use a toothpick or paring knife to gently swirl the colors together for a marbled effect.
- → Is there a way to change the flavor?
You can experiment by replacing peppermint extract with other flavorings like almond, orange, or extra vanilla for a unique twist.
- → How should I store the fudge?
Keep it in an airtight container in the fridge for freshness. It should last up to a week when properly stored.
- → Can I make this in advance?
Absolutely! Prepare the fudge a day or two before your event to ensure it sets well and the flavors develop fully.