
 Bookmark
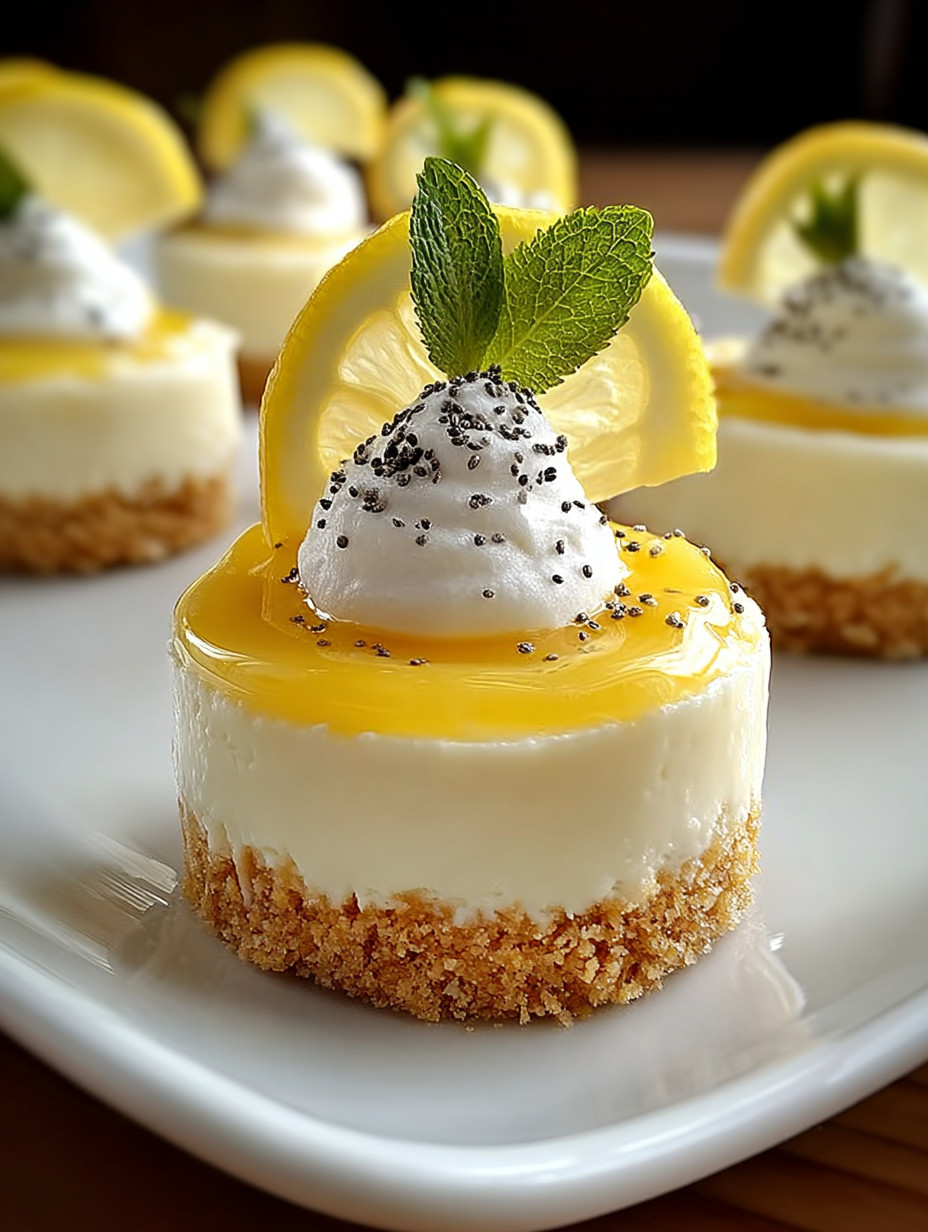
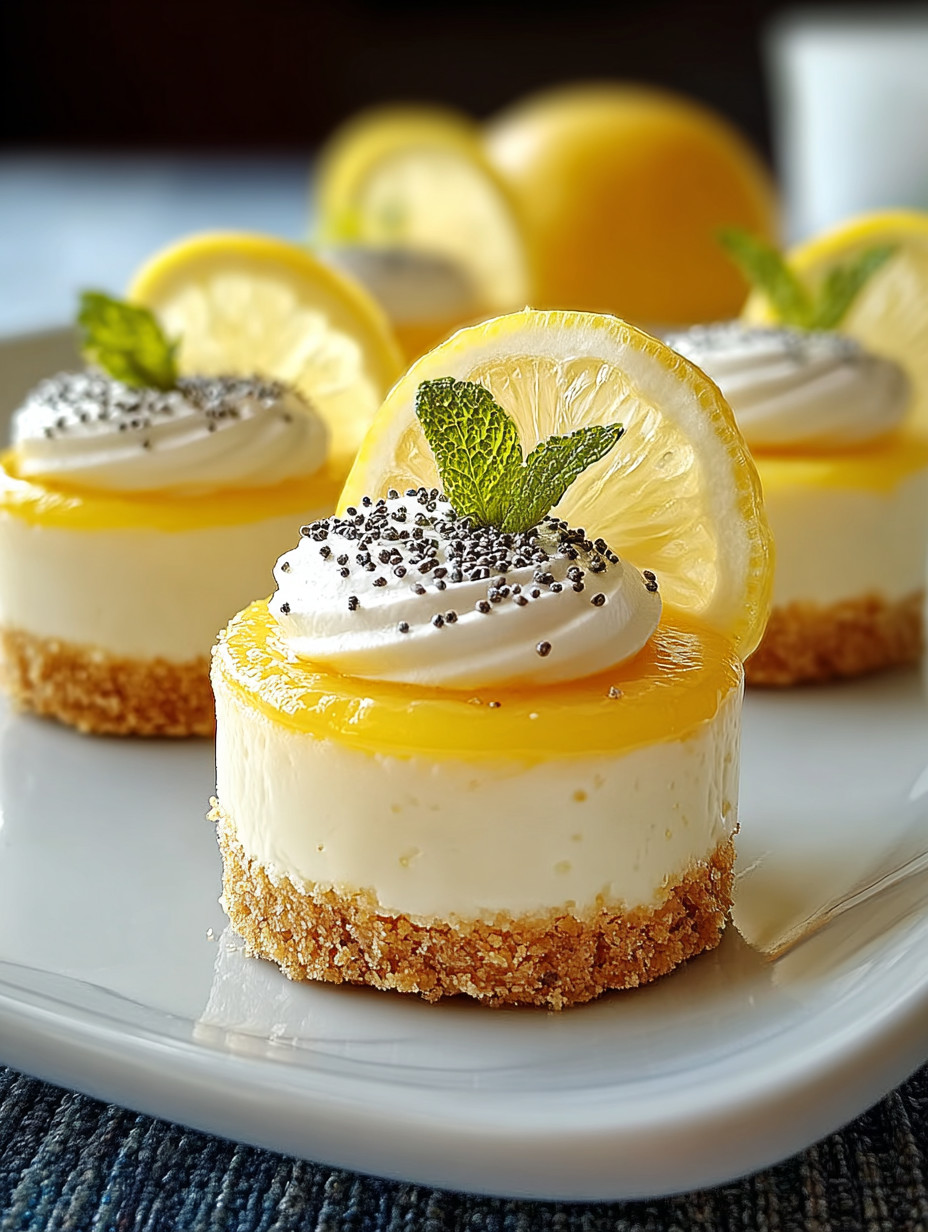
These exquisite mini lemon cheesecakes take the classic New York-style dessert and transform it into elegant, individual portions bursting with bright citrus flavor and creamy richness. Perfect for any occasion where you want to impress guests or enjoy a sophisticated treat yourself, this recipe combines smooth, crack-free cheesecake with a glossy lemon curd topping and delicate garnishes that create stunning visual appeal. The balance of tangy lemon and velvety cream cheese delivers a refined dessert experience that feels both indulgent and refreshing.
I first made these for a family celebration and the feedback was unanimous Everyone kept asking for seconds and the mini sizes made sharing easy and elegant
Ingredients
For the Graham Cracker Crust
- Graham crackers: provide a sweet, crunchy base that contrasts perfectly with the creamy filling
- Unsalted butter: binds the crumbs and adds rich flavor choosing good-quality butter makes a difference
- Granulated sugar: sweetens the crust and helps create the ideal texture
- Salt: balances all the flavors making sure the sweetness is not overwhelming
- Cinnamon: is optional but adds a warm, subtle spice that complements lemon nicely
- Vanilla extract: brings aromatic depth adding complexity to the crust
For the Lemon Cheesecake Filling
- Cream cheese: is the star ingredient creating a rich, smooth base and signature texture opt for full-fat for best results
- Granulated sugar: sweetens the filling evenly producing a light, fluffy consistency
- Large eggs: bind all ingredients and create the right set when baked
- Sour cream: adds tang and helps prevent cracking keeping the cheesecake silky smooth
- Fresh lemon juice: delivers bright, authentic citrus flavor that wakes up the palate
- Lemon zest: intensifies the citrus aroma and adds essential oils for freshness
- Vanilla extract: enhances the flavor without overwhelming the lemon brightness
- All-purpose flour: stabilizes the filling resulting in extra smooth texture
For the Lemon Curd Topping
- Fresh lemon juice: creates an intense citrus foundation for bright flavor
- Lemon zest: adds aromatic oils and visual vibrancy
- Granulated sugar: balances tartness and adds the perfect sweetness
- Large eggs: provide richness and give the curd a luscious silky texture
- Unsalted butter: adds a luxurious mouthfeel and glossy shine
- Salt: enhances flavors and balances sweetness beautifully
For Elegant Presentation
- Heavy whipping cream: whips into soft, piped decorations adding richness and beauty
- Powdered sugar: sweetens whipped cream seamlessly without grit
- Fresh lemon wheels: create stunning garnish that reinforces the flavor theme
- Poppy seeds: add an optional refined sprinkle for textural contrast
- Edible flowers: elevate the look for special occasions
- Candied lemon zest: finishes with intense flavor and professional polish
For Professional Finishing
- Apricot jam: adds a glossy protective coating for the curd topping
- Water: thins the jam for easier application
- Mint leaves: give fresh color and fragrant appeal
- White chocolate shavings: provide elegant color contrast
- Gold leaf: delivers ultimate luxury for special events
- Fresh berries: add color and complement flavors beautifully
Step-by-Step Instructions
Creating the Perfect Graham Cracker Crust
- Creating the Perfect Graham Cracker Crust:
- Preheat your oven to 325 degrees Fahrenheit then line a 12-cup muffin tin with paper liners or grease individual four-inch springform pans for smooth cheesecake removal Process one and a half cups of graham crackers in a food processor until uniformly fine crumbs form making sure there are no large chunks left to keep texture perfect Melt six tablespoons of unsalted butter then mix with crumbs, three tablespoons of sugar, and a pinch of salt until evenly moistened and the mixture holds together when pressed Divide this crumb mixture evenly among your prepared molds pressing it firmly into the bottom and slightly up the sides to form a sturdy crust for the filling Bake the crusts for eight to ten minutes until lightly golden and set then let them cool completely while you prepare the filling For extra flavor, brush the cooled crusts lightly with melted butter or a simple syrup infused with lemon juice before adding the filling
Preparing Silky Cheesecake Filling
- Preparing Silky Cheesecake Filling:
- Make sure the cream cheese is at room temperature before mixing to avoid lumps for smooth texture and professional appearance In a large bowl, beat twenty-four ounces of softened cream cheese with an electric mixer until completely smooth scraping the bowl often Gradually add three-quarters cup of sugar beating until light and fluffy which takes about three to four minutes ensuring the sugar is fully dissolved Beat in three large eggs one at a time mixing just until incorporated after each addition to avoid overmixing which can cause cracking Add half a cup of sour cream, one-third cup fresh lemon juice, two tablespoons lemon zest, and one teaspoon vanilla extract mixing gently until smooth and fully combined If any lumps remain, strain the filling through a fine-mesh sieve to create a silky smooth consistency which helps achieve that professional finish
Mastering the Baking Technique
- Mastering the Baking Technique:
- Divide the filling evenly among the prepared crusts filling each about three-quarters full to allow room for slight expansion without overflow Tap the molds gently on the counter to release any trapped air bubbles that might create imperfections in the cheesecake surface Place the molds in a large roasting pan and add hot water until it reaches halfway up the sides of the molds to create a water bath that prevents cracking and ensures even baking Bake for eighteen to twenty-two minutes until the centers are almost set but still slightly jiggly to avoid dryness from overbaking Turn off the oven and crack the door open slightly leaving the cheesecakes inside to cool gradually for one hour preventing sudden temperature changes that cause cracks Remove the molds from the water bath and allow the cheesecakes to come to room temperature before refrigerating to set the texture perfectly
Creating Glossy Lemon Curd
- Creating Glossy Lemon Curd:
- In a heavy-bottomed saucepan, whisk together half a cup fresh lemon juice, one-third cup sugar, three egg yolks, and a pinch of salt until smooth Cook over medium-low heat whisking constantly until the mixture thickens enough to coat the back of a spoon about eight to ten minutes with careful attention Remove from heat and immediately whisk in four tablespoons cold butter and one tablespoon lemon zest until the curd is smooth and glossy Strain through a fine-mesh sieve to remove lumps or cooked egg pieces ensuring the curd is silky smooth and perfect for topping Press plastic wrap directly onto the surface of the curd to prevent skin from forming then refrigerate until cool and thick enough to spread Before using, whisk the curd briefly to restore its smooth consistency and ideal spreading texture
Perfect Assembly and Presentation
- Perfect Assembly and Presentation:
- Carefully remove the cooled cheesecakes from their molds using a thin knife around edges if needed to avoid damage Spoon or pipe the cooled lemon curd evenly on top creating a smooth golden surface that highlights the curd’s shine Use an offset spatula for a clean, level curd layer or pipe it decoratively with a pastry bag to add artistic flair Whip heavy cream with powdered sugar to soft peaks and pipe decorative borders or rosettes for an elegant finishing touch Garnish each mini cheesecake with fresh lemon wheels, poppy seeds, or your chosen decorations arranging them thoughtfully for eye-catching impact Chill the assembled cheesecakes for at least two hours so flavors meld and texture reaches its ideal creaminess
Professional Finishing Techniques
- Professional Finishing Techniques:
- Warm two tablespoons apricot jam with one tablespoon water strain and brush lightly over the lemon curd to create a glossy, protective finish Create decorative patterns by swirling with a toothpick elevating the presentation to restaurant quality Dust serving plates lightly with powdered sugar or cocoa powder to frame each cheesecake beautifully Add final garnishes just before serving to maintain freshness and prevent wilting or discoloration For special occasions include edible gold leaf, candied citrus, or other luxury touches to create unforgettable desserts Serve on chilled plates with the right utensils so guests can fully enjoy the smooth texture and vibrant flavors
 Bookmark
Storage Tips
Store these mini cheesecakes covered in the refrigerator for up to three days to maintain freshness and prevent odors Keep the lemon curd and whipped cream toppings separate until serving day for best presentation If freezing, wrap each cheesecake tightly in plastic wrap then foil and thaw overnight in the fridge before serving Bring refrigerated cheesecakes to room temperature for about fifteen minutes before serving to soften the texture slightly
Ingredient Substitutions
You can use gluten-free graham crackers or almond flour for a gluten-free crust option without losing great taste Reduced fat cream cheese and Greek yogurt work well for a lighter filling with less richness Swap granulated sugar with erythritol or a sugar blend to make a diabetic-friendly version without compromising sweetness For a vegan approach, try cashew cream and vegan butter though texture will vary slightly and may need trial adjustments
Serving Suggestions
Present these mini lemon cheesecakes on decorative plates with fresh mint or edible flowers for springtime celebrations Pair with fresh berries or a mixed berry sauce to add extra color and flavor contrast Serve alongside a cup of high-quality black tea or a citrusy white wine to complement the tart and creamy notes Perfect for elegant weddings, dinner parties, or holiday gatherings where sophisticated individual desserts impress
Pro Tips
Room temperature cream cheese is key to a lump-free batter for smooth, professional texture Do not overbeat the eggs to avoid incorporating air which leads to cracks during baking Always use a water bath and cool gradually in the oven for crack-free, silky cheesecakes that look bakery perfect
Common Recipe Questions
- → How to prevent cracking during baking?
Use a water bath to distribute heat evenly and retain moisture. Avoid overbeating eggs to reduce air incorporation, and cool the cheesecakes gradually by slightly opening the oven door after baking.
- → What’s the best way to remove cheesecakes from molds?
Use paper liners in muffin tins for easy removal. If using springform pans, run a thin knife around the edges while slightly warm, then cool completely before release.
- → How do I know when the cheesecakes are done baking?
The centers should be almost set but still slightly jiggly when lightly shaken. Residual heat will finish the cooking during cooling.
- → Can these mini portions be prepared in advance?
Yes. They can be baked up to three days ahead and refrigerated covered. Add lemon curd topping and decorations just before serving for best results.
- → What garnishes enhance presentation?
Fresh lemon wheels, whipped cream borders, poppy seeds, edible flowers, and candied lemon zest add elegant visual appeal and complementary textures.
- → How to achieve a glossy lemon curd topping?
Cook lemon curd gently until thick and strain to remove lumps. Brush with warmed apricot jam for a smooth, shiny finish before garnishing.